2 Ways to Use Automation Pro: Onboarding & Conversions
February 21, 2018 4 min read
Automation Pro is here! Simply put, it’s the clear solution to create quality, ongoing customer engagement. With the launch of Automation Pro, we’ve built in a handful of templates that demonstrate practical strategies that any marketer can execute. In this post, we’ll focus on two of them and provide some real-life examples of what can be accomplished with our powerful new automation tool.
Onboarding
This template is designed to help you turn website visitors into subscribers. According to the Data & Marketing Association, 66% of online consumers have made a purchase as a result of an email engagement campaign. Armed with that data, there’s no reason not to create an automated sales funnel based on website visitors. Now we think it is a great example of when to use a prebuilt email automation. In this way. It saves time, you can learn / explore and gets you started faster. Also we did the standard settings so you can be worry free that the basics are all there. Practically speaking, these are already good leads as they are people who have shown interest in your goods or services by visiting your website and even the page for a specific product or service.
So, how can you put this into action?
Let’s say you’re a brand that is launching a new product. You’re running various marketing campaigns that direct potential customers to a landing page for that product. The first step is to create a popup signup form to place on that page. We suggest adding an incentive for subscribing, such as a 10% discount or something else that would encourage someone to buy. Other incentives can include an exclusive PDF, webinar or any other educational resource that may be of value to your subscribers. Be sure to assign your popup form to a new list for onboarding.
Next, install the tracking code on the desired web page or landing page. This is how Automation Pro will know if an individual visited your website or page.
Now it’s time to build your onboarding journey.
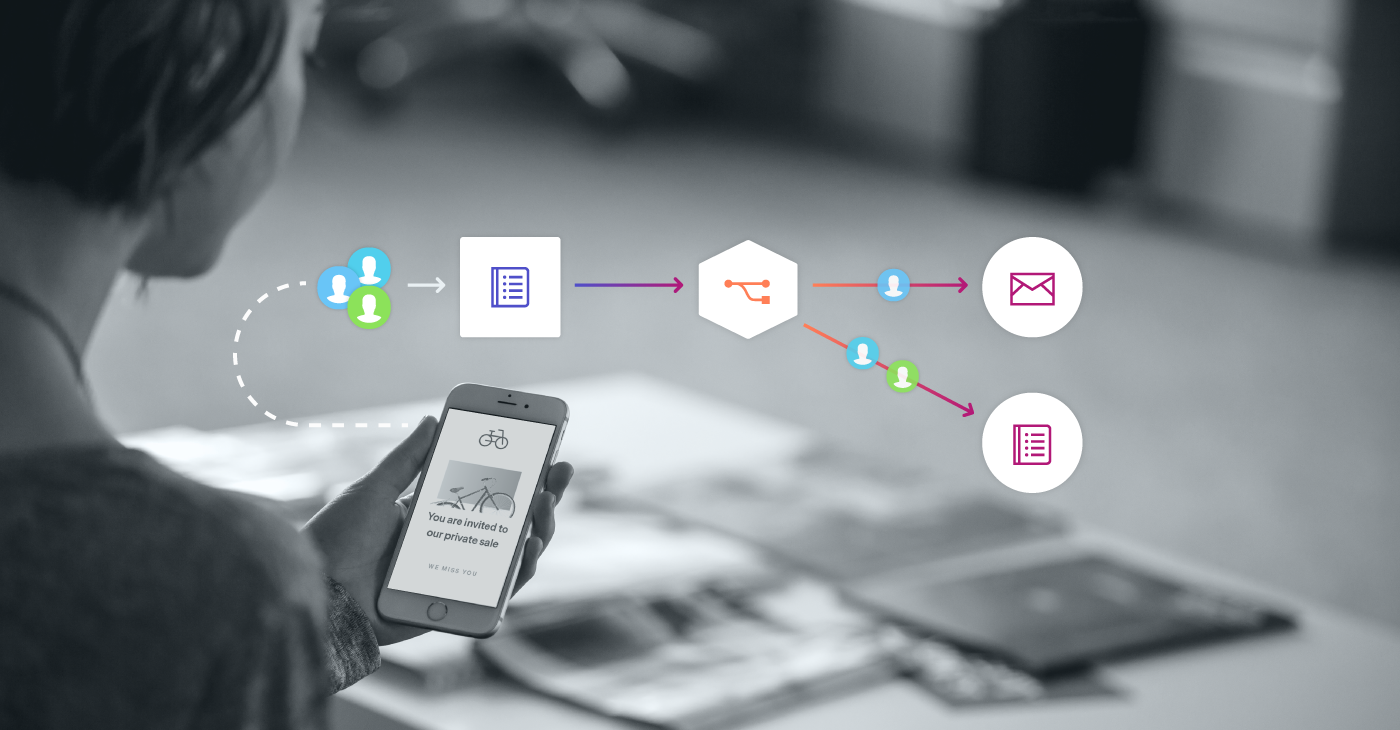
First, you’ll set the Added To List Entry point to match your designated onboarding list, which is attached to the popup signup form you’ve created. As people visit your page, the popup form will be prompted with the 10% discount offer. Once they subscribe, they will automatically be added to the list you selected and the journey begins.
Next, you’ll create a Welcome Email for the Send Email node. As Subscribers are added to your onboarding list, this next part of the journey is triggered and the Welcome Email is sent. This should include the promo code for their 10% discount (you will need to input the promo code of your choosing into your eCommerce platform).
Conversion
Now that you’ve created a practical solution to onboard new subscribers, it’s time to turn those new opt-ins into customers. If we’re continuing the above example, the goal is now to entice your new subscribers to act on the 10% discount incentive you offered before. To do this, you will send a series of emails highlighting the product or service’s benefits and reminding subscribers of their discount.
For this example, we’ll be showing you how to create a 7-day cycle aimed at converting your leads.
Here are the steps to take before you create your conversion journey:
- Create a “Customers List.” This is the list that your subscribers will automatically be transferred to if they complete a purchase on your site.
- Plan your engagement campaign. Think of the journey you want your leads to experience.
- Create a “Purchase Confirmation” Journey. This is a small journey that will constantly check for subscribers who make a purchase. Once a purchase is made, this journey will move the subscriber from your “Onboarding List” to your “Customers List.”
- It is extremely important that your Automation Pro tracking code is installed on your Thank You page.
Let’s look at the steps to take to create your Conversions Journey.
Like the previous journey, this one begins with the Added To List Entry Point for your onboarding list. Since you sent the Welcome Email immediately for the previous journey, it’s important to add a wait time with your next node. That way you won’t overwhelm your subscribers with too many emails at once.
Now, put yourself in your subscriber’s shoes. While the goal is to inspire conversions, you must keep the potential customer in mind. So, multiple CTAs to buy may not be effective. What will likely work better, is a series of emails that demonstrates the value of your product(s) or service(s). This can include customer testimonials. After all, 55% of shoppers say that online reviews influence their purchasing decision according to Kissmetrics.
In this example, we’ll create a three email journey. Don’t forget to add a wait time between each engagement email you’ll be sending. Otherwise, they’ll all send at once!
First, you should send a discount reminder on Day 3 after an individual subscribes to your onboarding list. For some, that’s all it will take and they’ll be moved to your Customers List.
For those that remain in your Onboarding List, try sending an engagement campaign with a product highlight or testimonial on Day 6.
If you still haven’t converted a subscriber after your first two attempts, try a free shipping offer on Day 7. According to the Walker Sands Future of Retail 2016 study, nine out of 10 surveyed listed free shipping as the top incentive when asked what would make them more likely to shop online.
The goal for this journey is to generate sales. It is important to set an end date for the journey so you can look back at what you created and then make improvements for the next journey. If you have a never ending journey, it will be hard to measure, compare and use the data to improve for future journeys.

Andy Shore found his way to Benchmark when he replied to a job listing promising a job of half blogging, half social media. His parents still don’t believe that people get paid to do that. Since then, he’s spun his addiction to pop culture and passion for music into business and marketing posts that are the spoonful of sugar that helps the lessons go down. As the result of his boss not knowing whether or not to take him seriously, he also created the web series Ask Andy, which stars a cartoon version of himself. Despite being a cartoon, he somehow manages to be taken seriously by many of his readers ... and few of his coworkers.
Benchmark Recommends
See all articles

Sync 2,000 Contacts with your Benchmark Account for Free